🛡️ App Safe Wizard Run
Based on user feedback, simplifying the onboarding experience to cut down the time to value was a top priority. That's why the onboarding experience in App Safe was enhanced to support a guided, two-step flow that accelerates adoption without compromising control or compliance.
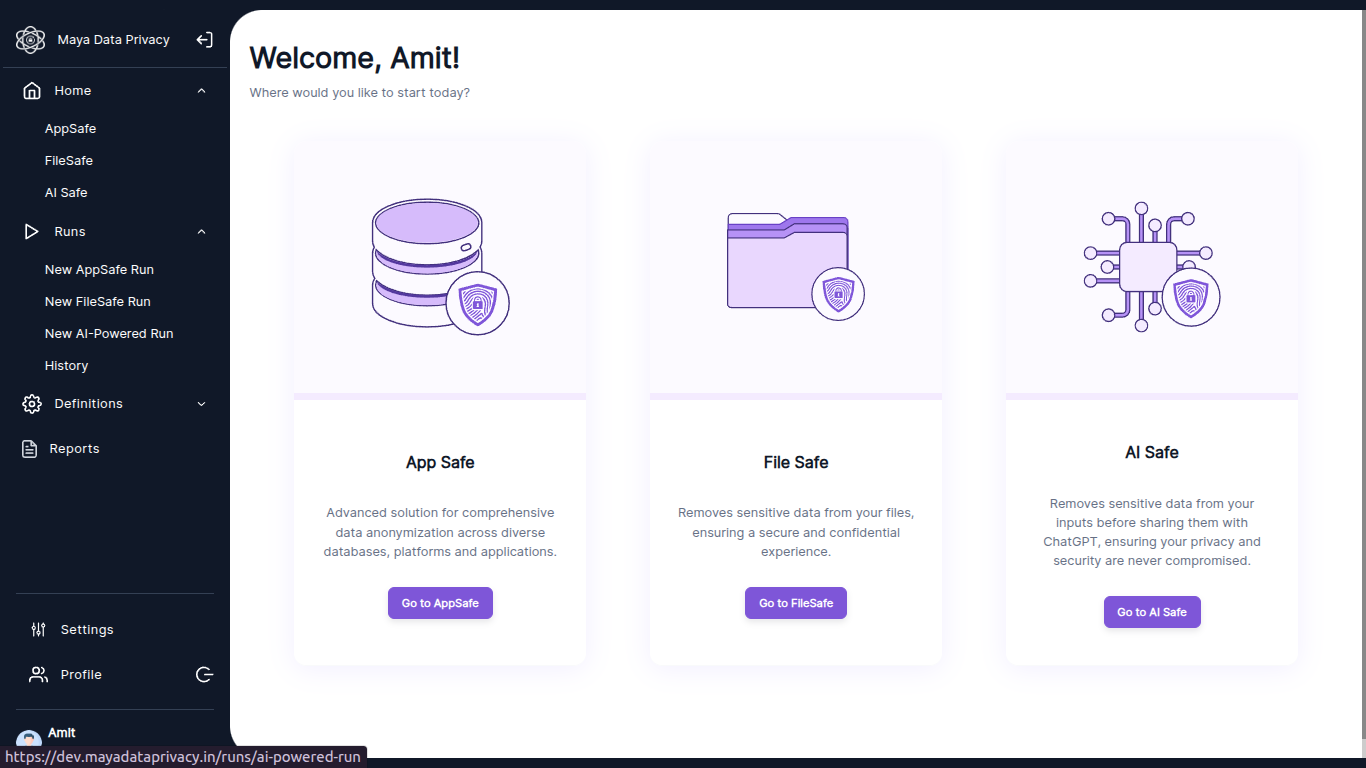
🚀 To Launch the App Safe Wizard the user can click on the “Go to App Safe” button from the Home Page.
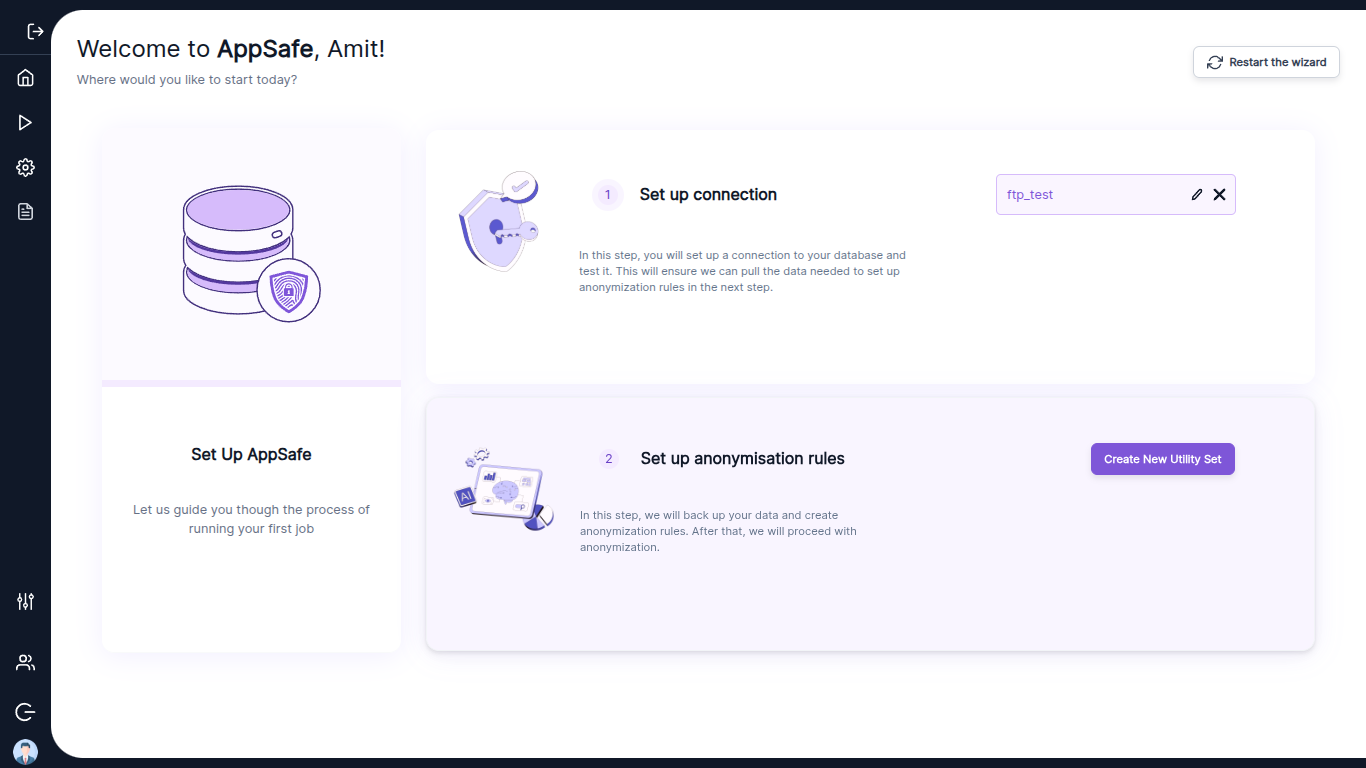
The user will be led to the Set-Up App Safe screen as seen below. The Wizard onboarding is a simple two-step process.
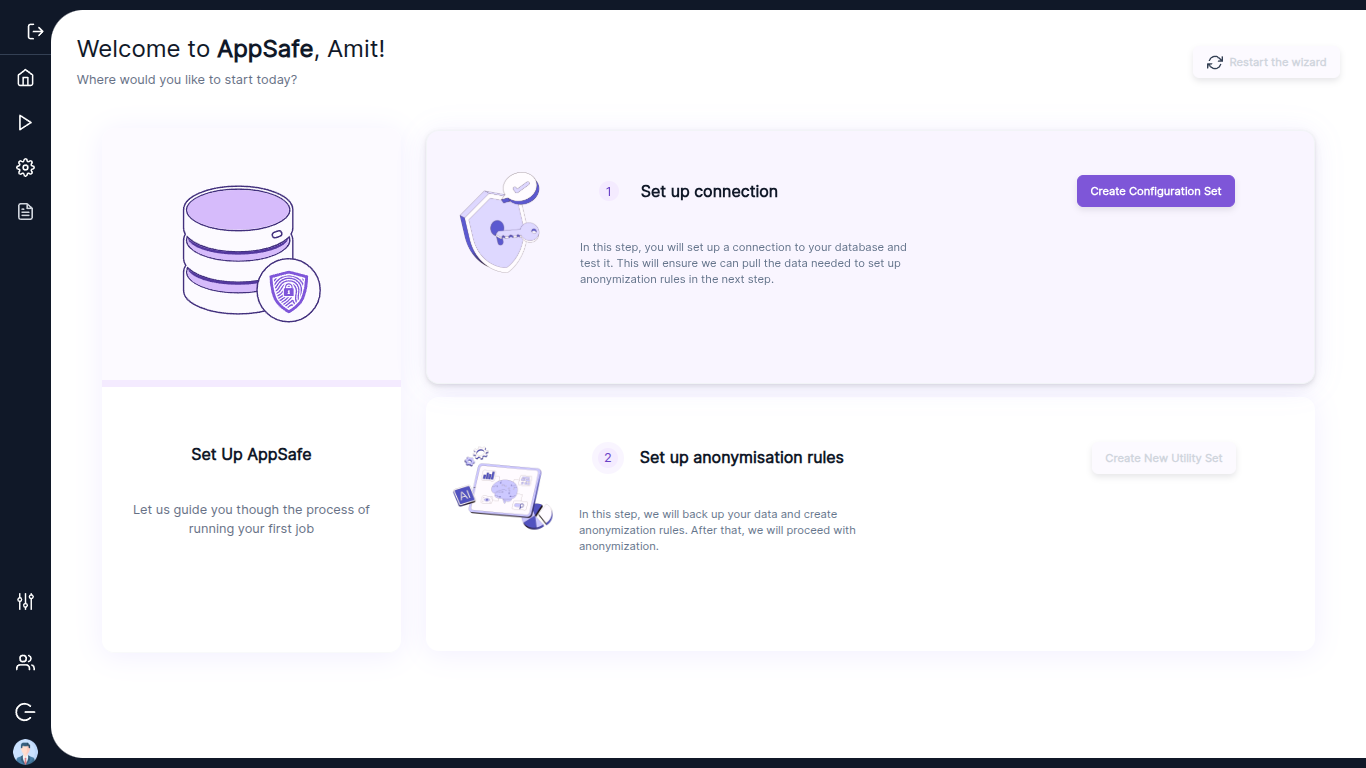
🔌 Step 1: Set up the Connection
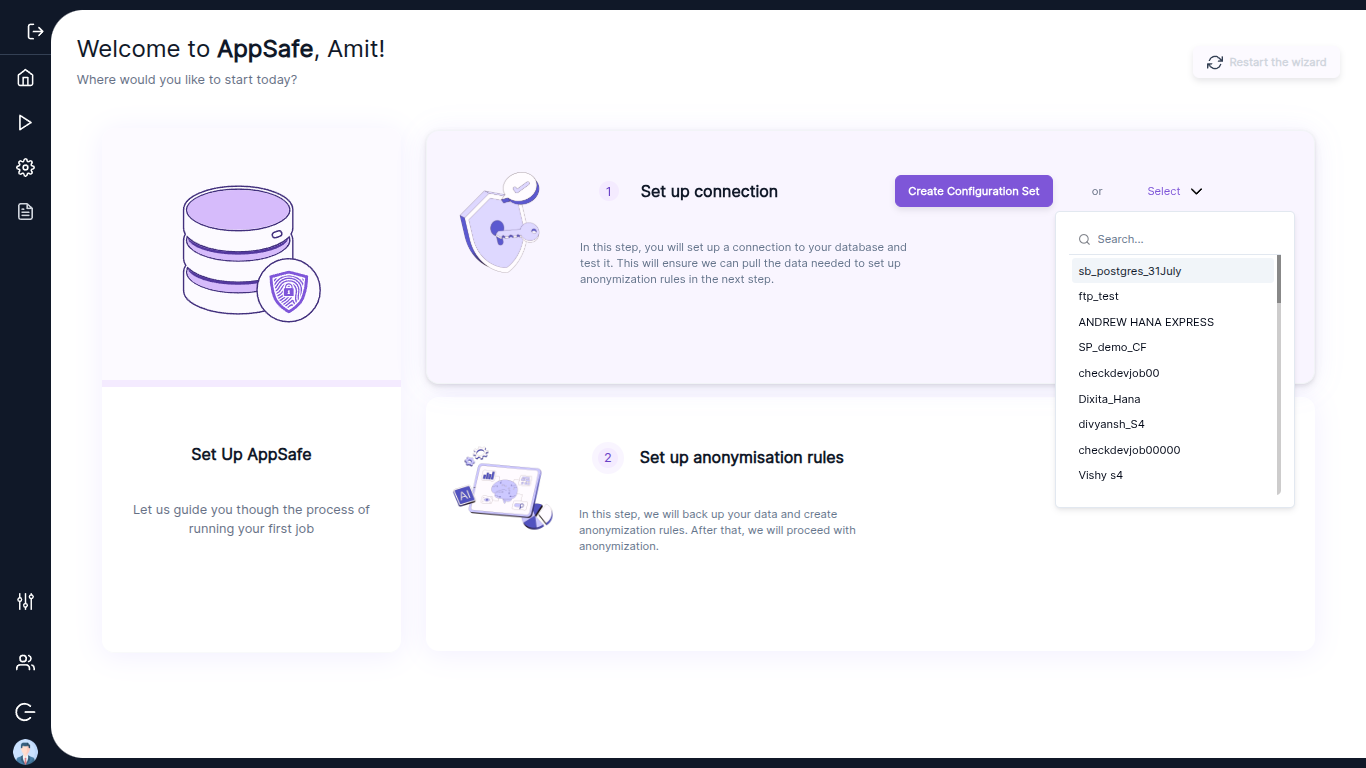
In this step the user will set up a connection to their database and test it. This will ensure that the user can pull the data needed to set up anonymization rules in the next step. The user can either create a new Configuration set by clicking “Create Configuration Set” or select an existing one using the “Select” option.
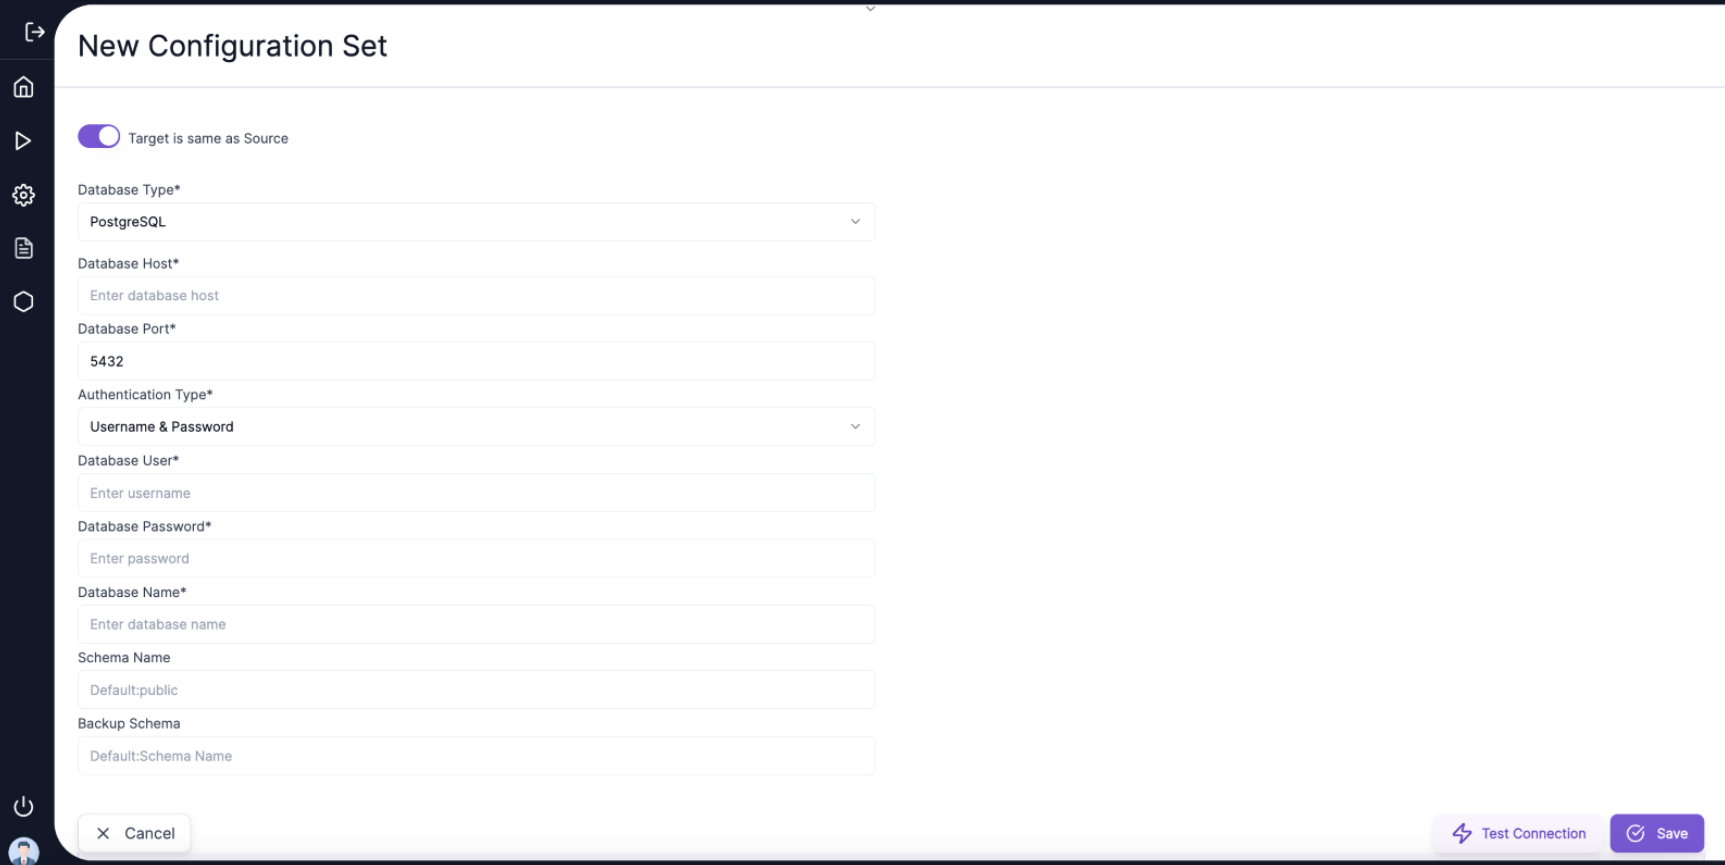
When the user clicks on Create Configuration Set, they will be led to the corresponding screen. Here user can define a new connection as done by entering the connection type as “DATABASE” and Database type as “Postgres/ HANA/ Oracle” and the necessary Database connection details as currently done for App Safe.
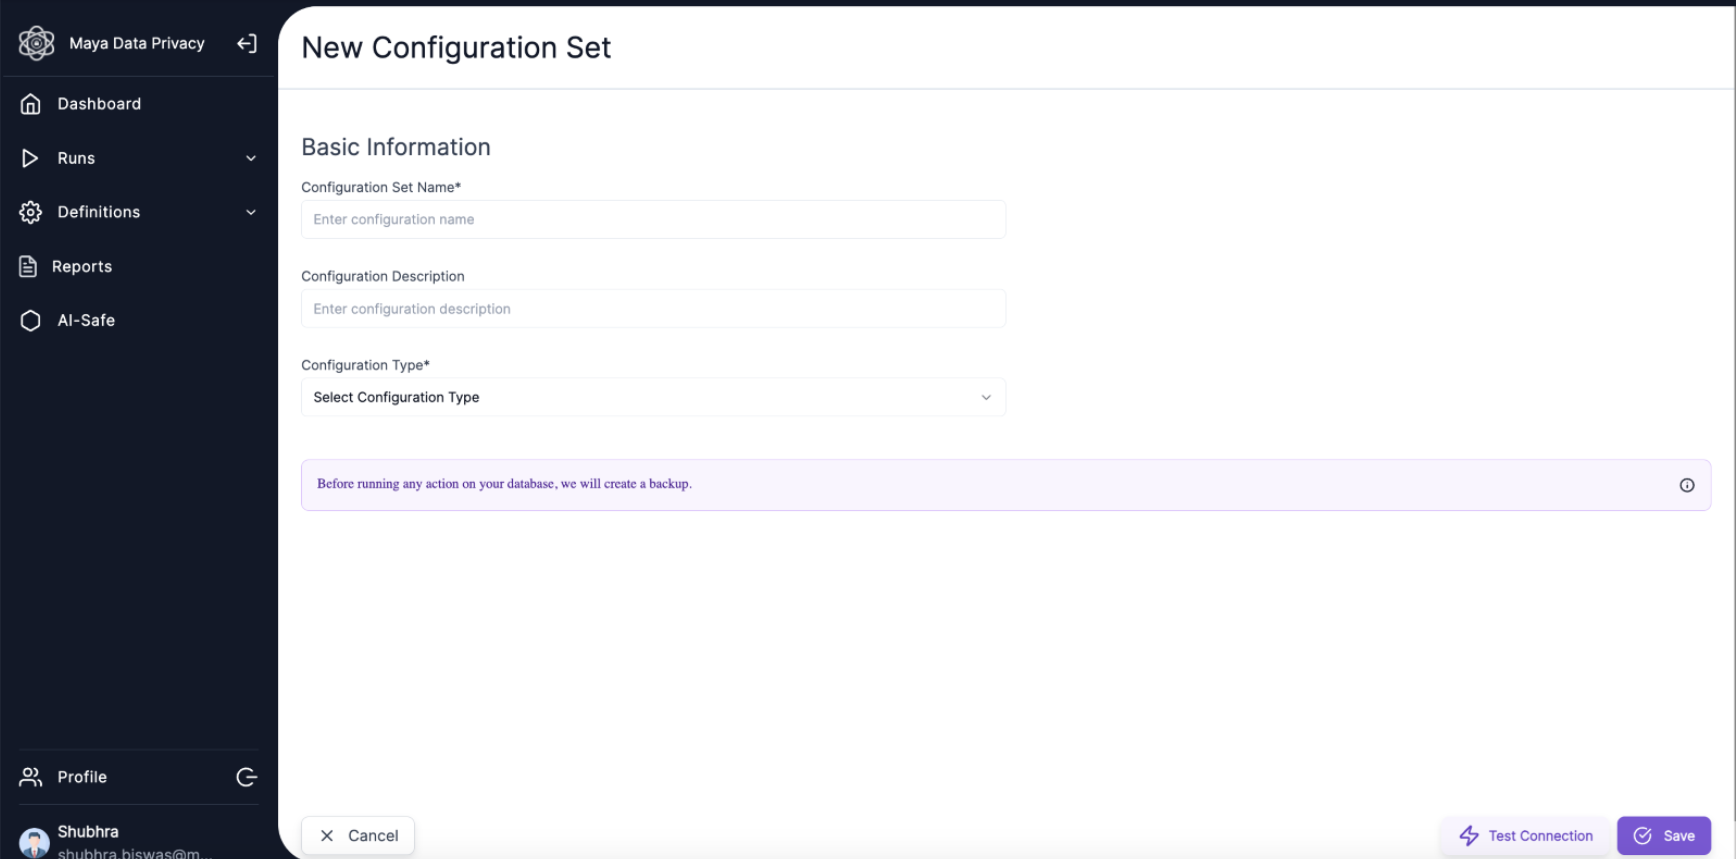
✅ Once the valid user connection details are entered user can test the connection using the “Test Connection” Button and proceed with Saving the connection details by clicking “Save”.
🗂️ Once the configuration set has been created, user can view the selected Configuration set in the drop down. They have the option to edit and delete a configuration set if required. In case of any error the user has the option to restart the wizard using the top right button.
🛠️ Step 2: Create New Utility Set
The user can create AI assisted anonymization rules, customize anonymization rules if required and do a Run. The user's original data is Backed up before executing the anonymization Run.
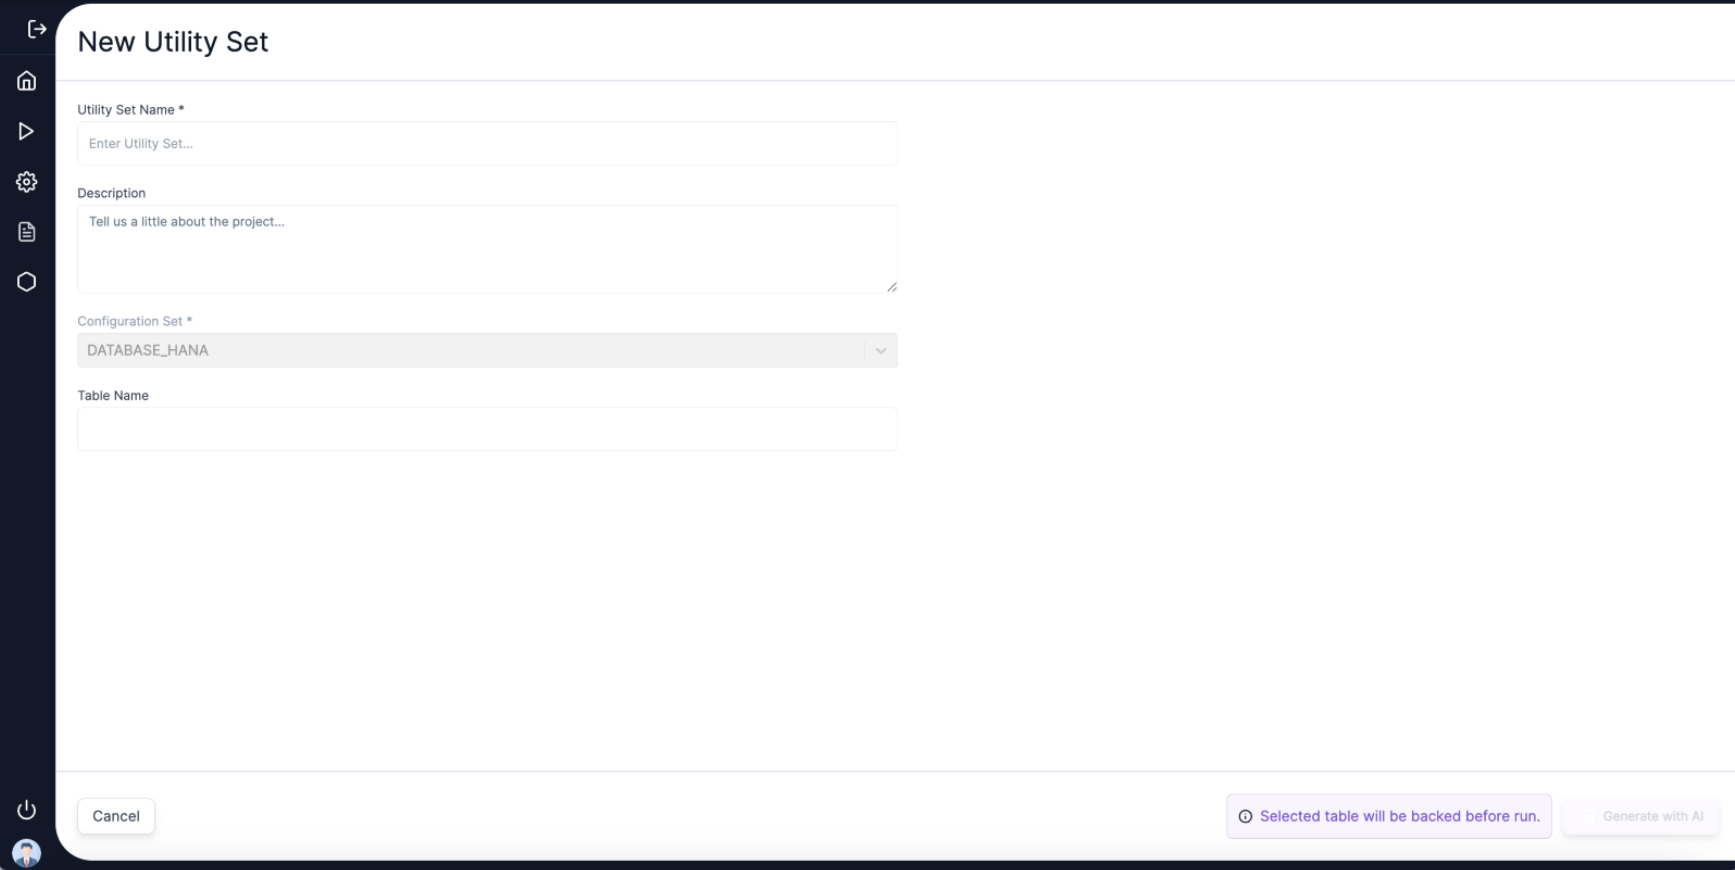
📝 In this step user must enter the “Utility Set Name” and “Table Name” and click on “Generate with AI” button to create an AI Powered utility set. In the current onboarding Wizard, the number of tables has been restricted to one table per run.

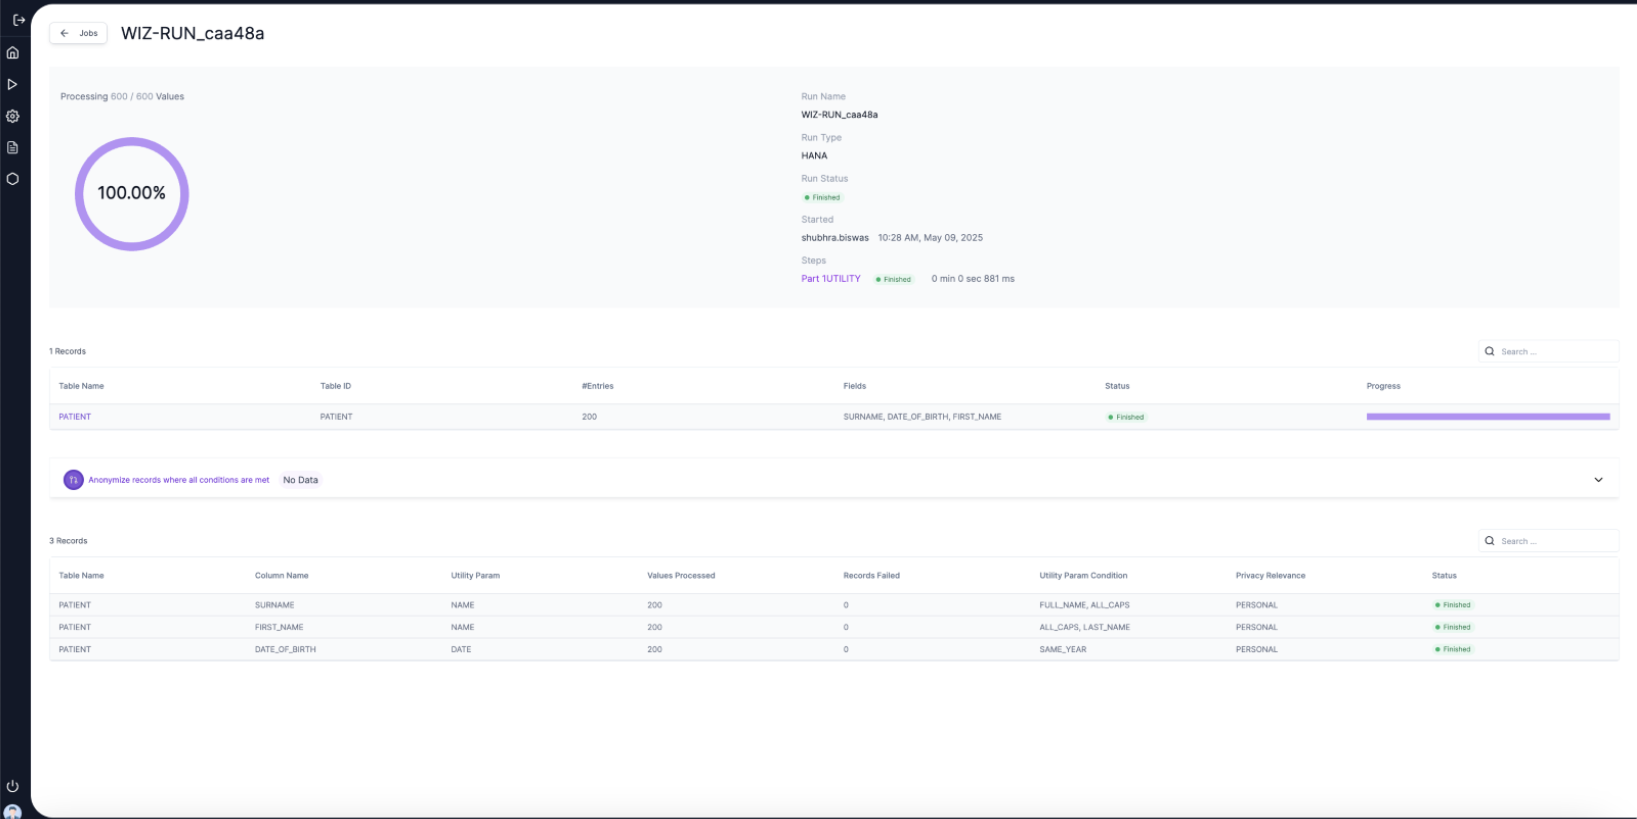
🤖 With the AI Leveraged Utility set creation all the PII containing columns of the selected table will be detected and a Utility Parameter will be set to it. For example, in the above screen the Column FIRST_NAME of the table PATIENT was assigned a utility parameter NAME and similarity the DATE_OF_BIRTH column was detected as DATE.
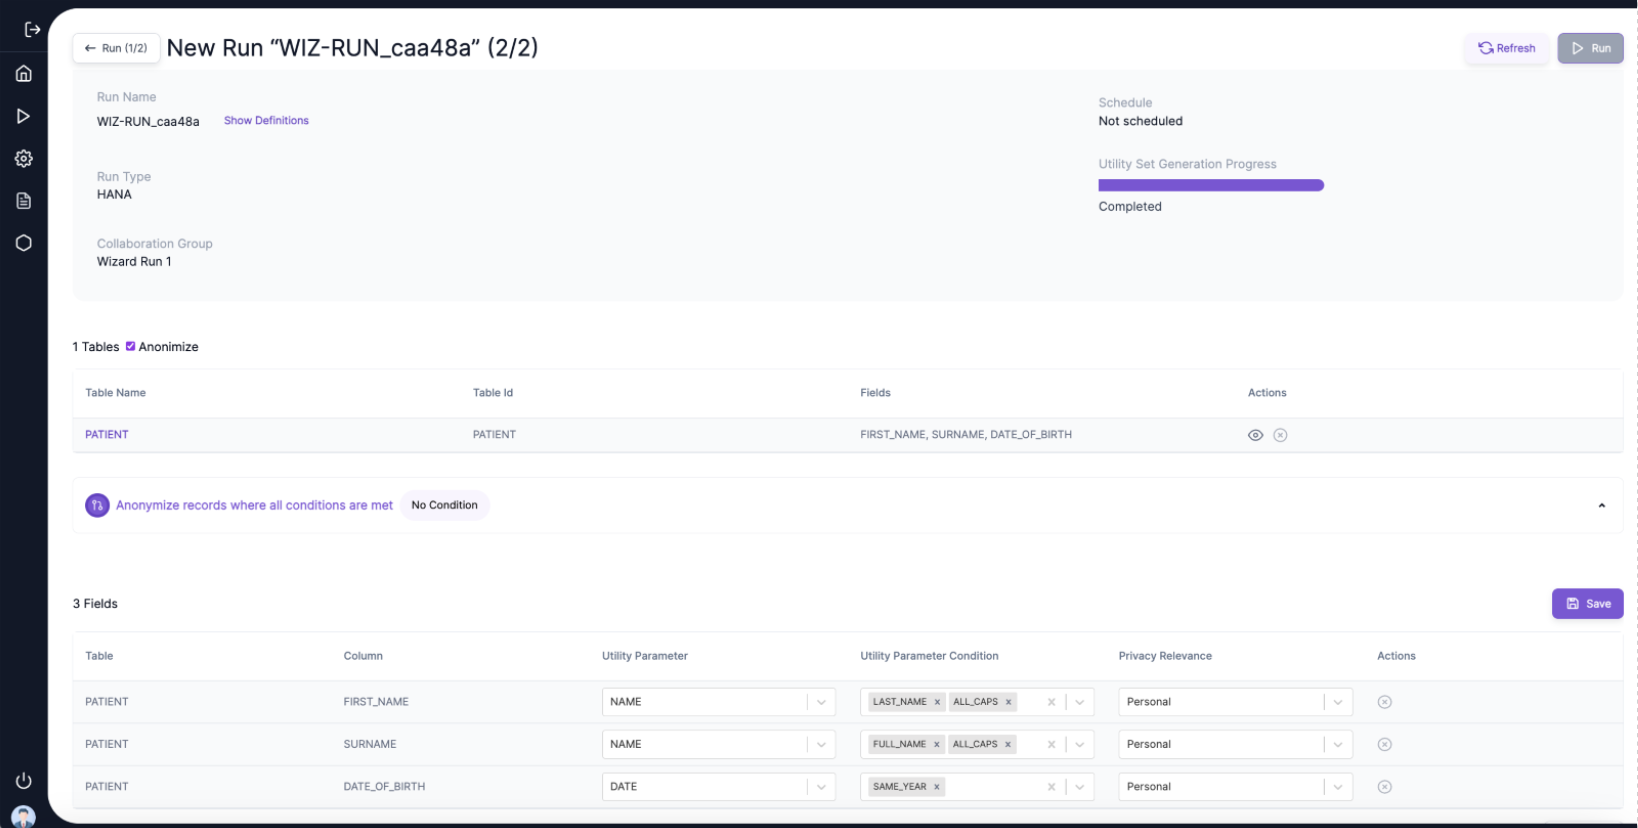
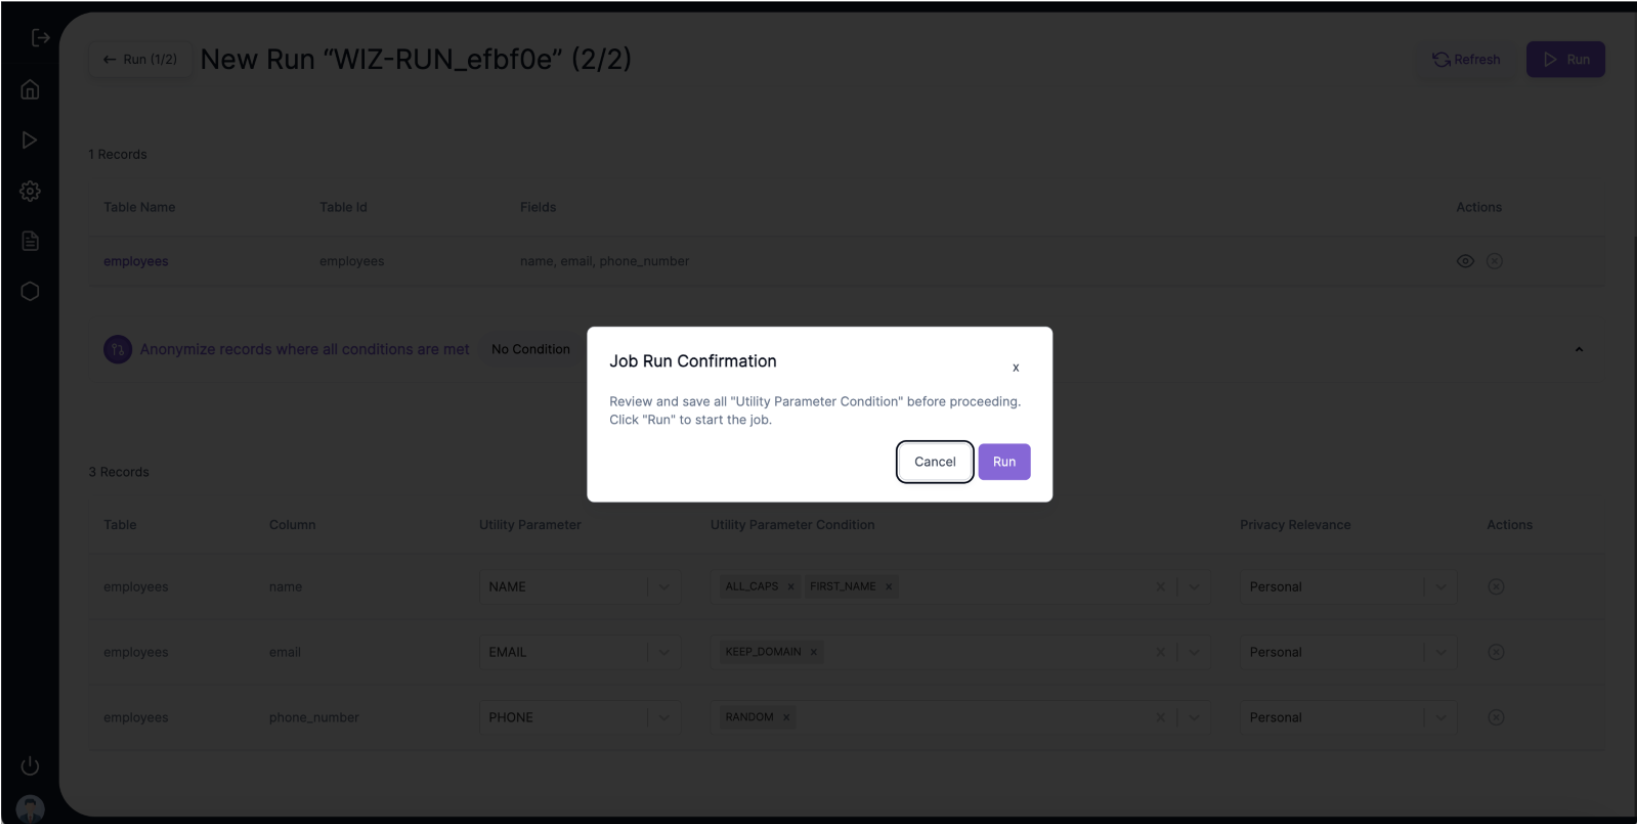
🧩 The user also has the option to customize the Utility Parameters and set the Conditions and Privacy Relevance parameters. They must click on “Save” and will be asked for confirmation before they can proceed for “Run”.
💾 Before the Run is executed a Backup of the original table will be taken.
📊 Once the anonymization has been completed the Run Summary is depicted using graphical and statistical representations offering insights of the anonymization status at level of the Run, Step, Column and Tables.